 Esses medicamentos não são milagrosos. que emagrece é dieta e exercício. A medicação diminui a fome e facilita que a pessoa faça a dieta. Mas remédio, em si, não emagrece. Você pode tomar todos eles, mas se não fizer dieta e exercício, não adianta”, reforça Henrique Suplicy, médico endocrinologista, professor de endocrinologia da UFPR e membro da diretoria da SBEM.
Metabolismo mais lento e alterações hormonais experimentados por mulheres a partir dos 40 anos são alguns dos principais fatores que dificultam a veja isto perda de peso e a definição de músculos a partir da idade. Mas truques simples na rotina de exercício podem fazer grande diferença no processo.
Esses medicamentos não são milagrosos. que emagrece é dieta e exercício. A medicação diminui a fome e facilita que a pessoa faça a dieta. Mas remédio, em si, não emagrece. Você pode tomar todos eles, mas se não fizer dieta e exercício, não adianta”, reforça Henrique Suplicy, médico endocrinologista, professor de endocrinologia da UFPR e membro da diretoria da SBEM.
Metabolismo mais lento e alterações hormonais experimentados por mulheres a partir dos 40 anos são alguns dos principais fatores que dificultam a veja isto perda de peso e a definição de músculos a partir da idade. Mas truques simples na rotina de exercício podem fazer grande diferença no processo.
quinta-feira, 12 de abril de 2018
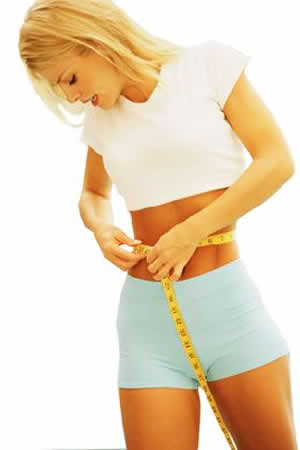
Faça Isso Para EMAGRECER 5 Kg Em 1 Mês
Na semana passada falamos sobre emagrecer de forma saudável sem passar fome ou contar calorias no artigo Como Emagrecer (por favor, ler para uma introdução aos princípios do emagrecimento). Mas vale ressaltar que a dieta deve ser seguida à risca, pois caso você falhe em algum momento, ela terá que ser reiniciada mostrando que você não aprendeu como perder 5 kg em uma semana do jeito certo. Não se esqueça que durante esses pequenos intervalos é importante beber água, respirar com tranquilidade e ganhar energia para retomar os exercícios.
Ae galera, vou fazer um grupo pragente esta trocando informaçoes sobre dietas, vamos nos ajudar a emagrecer. É um cardápio com alimentos baratos e fáceis de clique e veja mais encontrar em qualquer supermercado, é um cardápio com bastante frutas e verduras. Tem também na dieta de 1.200 calorias cereais, iogurte e proteína magra.
Tratamentos como Bodywave, a Endermologia LPG, a Lipoaspiração não invasiva - Titano Powershape, a Pressoterapia ou a Radiofrequência Tripolar Cronus diminuem a gordura corporal em excesso e ajudam a perder quilos e centímetros a mais de forma saudável, rápida e segura.
Fluoxetina não emagrece. Ela diminue sua ansiedade, e consequentemente você não faz aqueles ataques a geladeira. Fluoxetina é um medicamento seguro, mas é recomendável uma consulta ao médico. Mas para emagrecer não basta apenas tomar fluoxetina, é necessário fazer uma restrição alimentar. Não é passar fome, é omer corretamente e estabelecer metas reais. Você não engordou em 3 meses então porque quer emagrecer em 3 meses? Estabeleça metas reais, se sair do regime em um dia volte no outro. que importa é a soma de calorias de todos os dias do mês.
Desligue-se da negatividade. É fácil se frustrar quando se trata de emagrecer. Nunca acontece super rápido, nem é tão fácil quanto gostaríamos que fosse. Às vezes você vai sentir que se esforçou 120% nas últimas semanas e, quando subir na balança, terá perdido 300 gramas. Todo mundo já passou por isso e é um saco. A coisa mais fácil do mundo é se render à negatividade. Mas não ceda! É assim que começa a desmotivação.
Esses medicamentos não são milagrosos. que emagrece é dieta e exercício. A medicação diminui a fome e facilita que a pessoa faça a dieta. Mas remédio, em si, não emagrece. Você pode tomar todos eles, mas se não fizer dieta e exercício, não adianta”, reforça Henrique Suplicy, médico endocrinologista, professor de endocrinologia da UFPR e membro da diretoria da SBEM.
Metabolismo mais lento e alterações hormonais experimentados por mulheres a partir dos 40 anos são alguns dos principais fatores que dificultam a veja isto perda de peso e a definição de músculos a partir da idade. Mas truques simples na rotina de exercício podem fazer grande diferença no processo.
Assinar:
Postagens (Atom)